Survey Properties
Users can apply various Survey Properties to configure their survey for particular sets of respondents. Survey Properties can be accessed from survey Tab of the Design page.
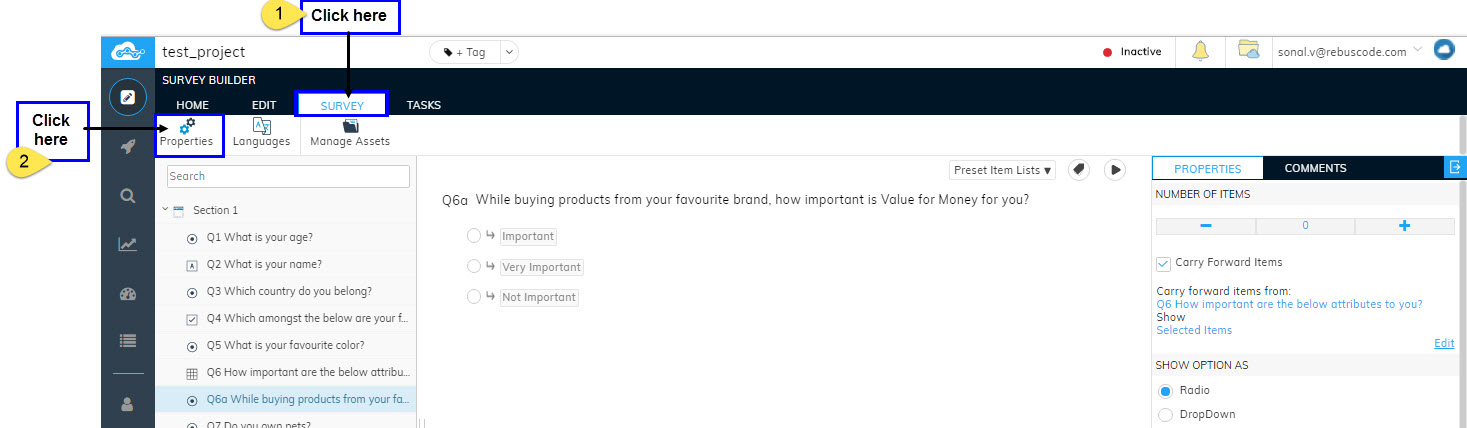
Simply click on Properties in the Survey tab.
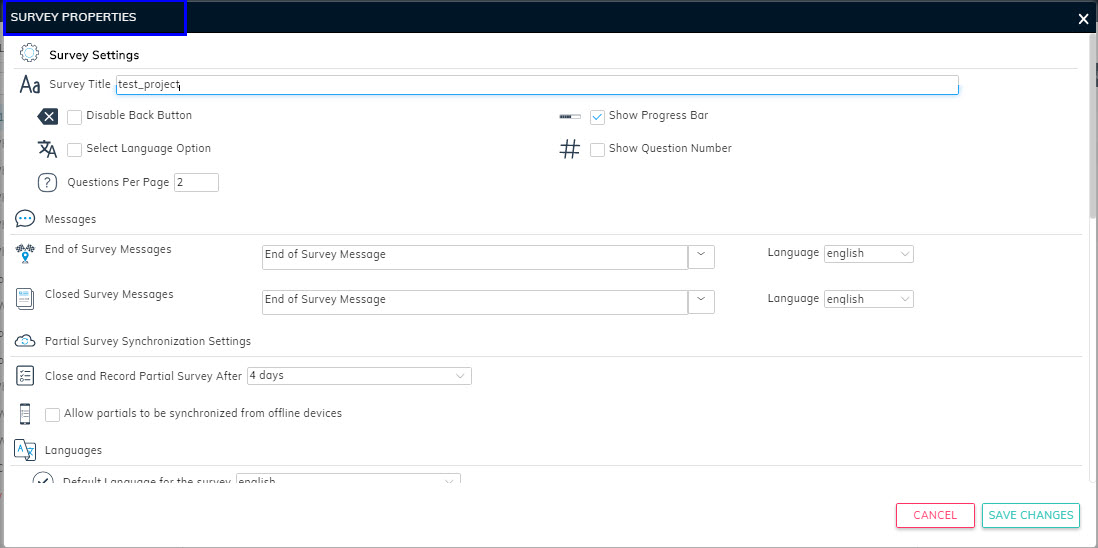
A pop-up will appear showing you all the Survey properties you can apply to your survey.
Listed below are the Survey properties you can apply to your Survey:-
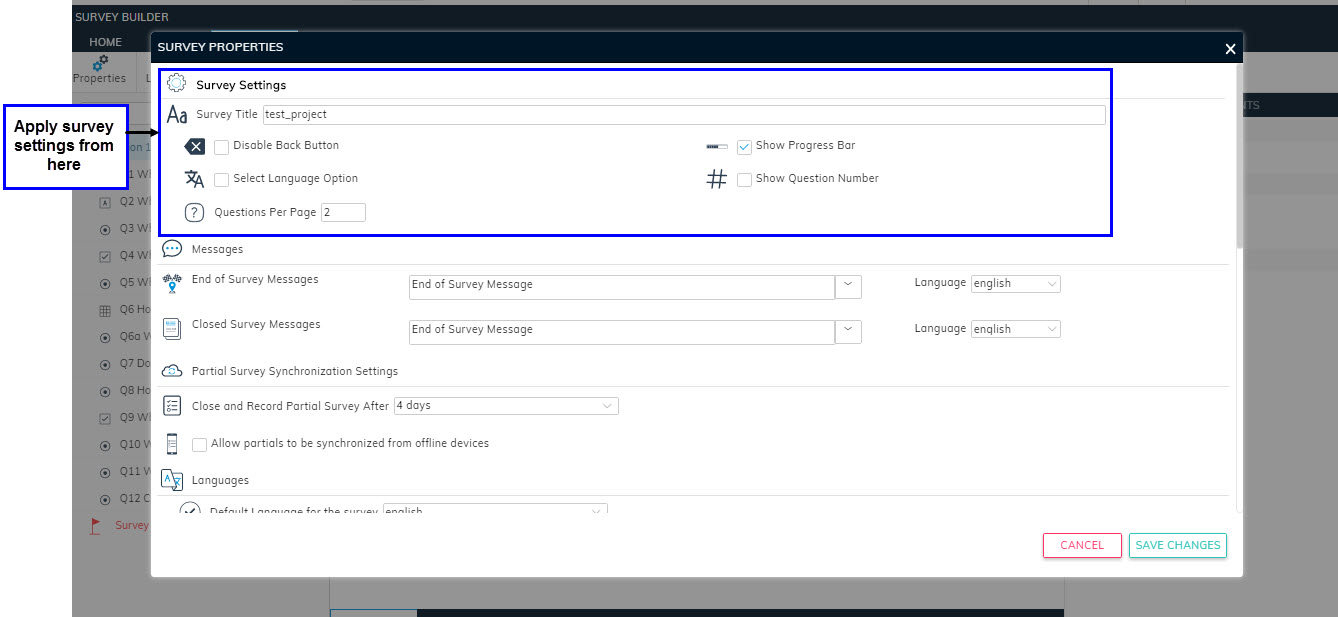
Survey Settings
The Survey Settings Section in the properties window, allows you apply below settings:-
- Survey Title: This field shows the current survey title for your survey and users can change it by entering new Survey title here.
- Disable Back button: Users can Check or Uncheck this check-box to Disable or Enable the Back button they see in their survey so that, they are not allowed to go back to the previous page once they have answered the question in it.
- Select language option: If this option is selected in teh survey properties, when the survey is launched, the respondent willl see a Select Language drop-down. The can then select the language in which they want to take the survey.
- Questions per Page: Users can specify from here the number of questions they want to show in one Page in the Survey.
- Show Progress bar: Progress Bar for the survey can be enabled/disabled by selecting/deselection thi scheck-box respectively.
- Show Question Number: Users can select/deselect this check-box if they wish to show/hide question numbers in their survey.
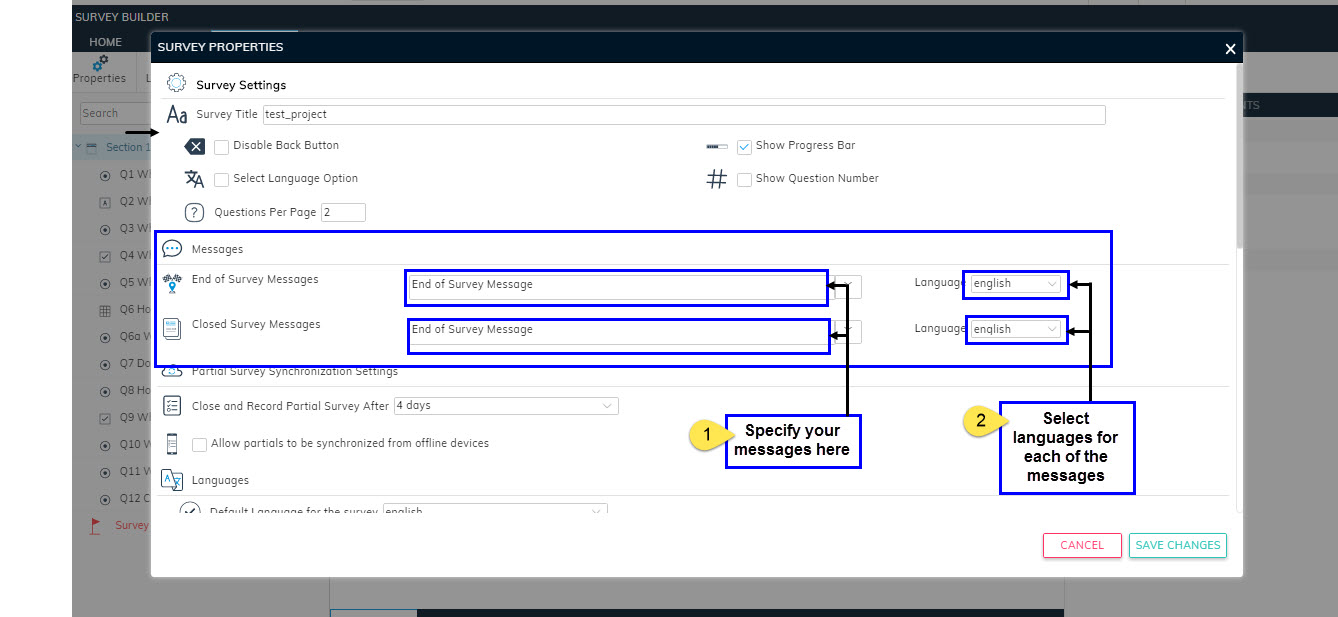
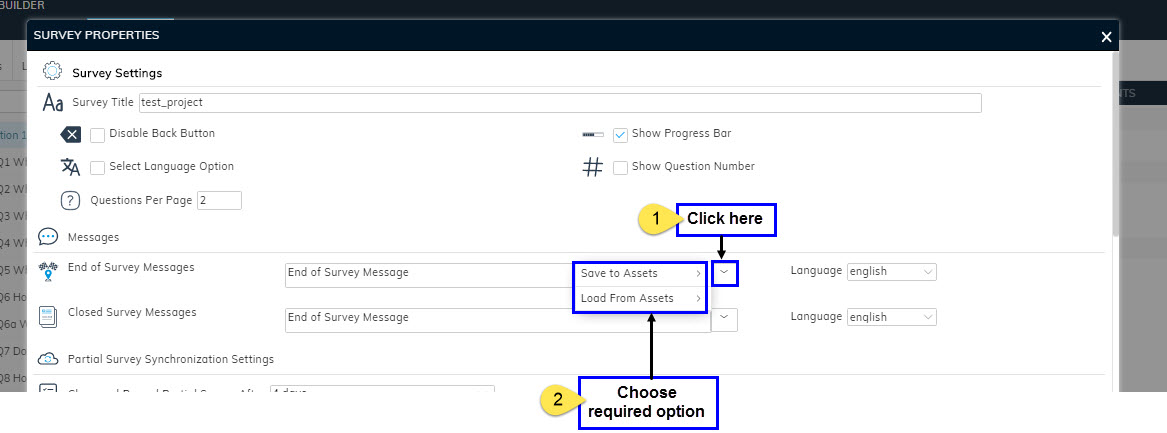
Messages
In this section of Survey Properties, users can specify and configure their Survey End and Closed Survey messages which will be shown at the end of the survey or when the survey is terminated respectively.
Once specified the messages here, these messages will always be shown at the end of the Survey or when the survey is terminated based on some logic.
Users can also choose Languages in which these messages will be displayed.
Users can Save /Load their messages from Cloud assets or Company Assets based on their user permissions. Simply click on the Save/Load icon next to each text field to Save/Load your messages.
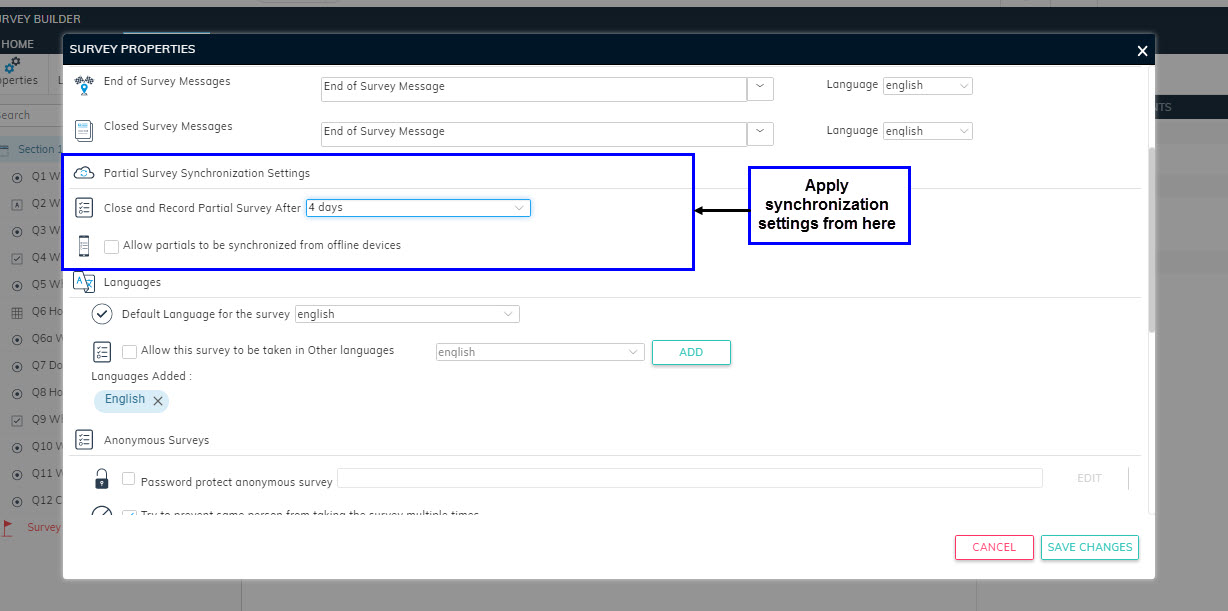
Partial Survey Synchronisation Settings
Users can apply the below two settings for their partial survey records:-
- Choose and Record Partial surveys after: Users can select a time duration from this drop-down after which all the partial surveys will be closed and recorded. It allows 4 time duration that are 4 Days, 7 Days, 30 Days and Never.
- Allow partials to be synchronised from offline devices: This is basically for the tablet based surveys. If the user selects this option, partial survey taken from the tablets/phones taken in offline mode will be synced automatically and the responses will be recorded.
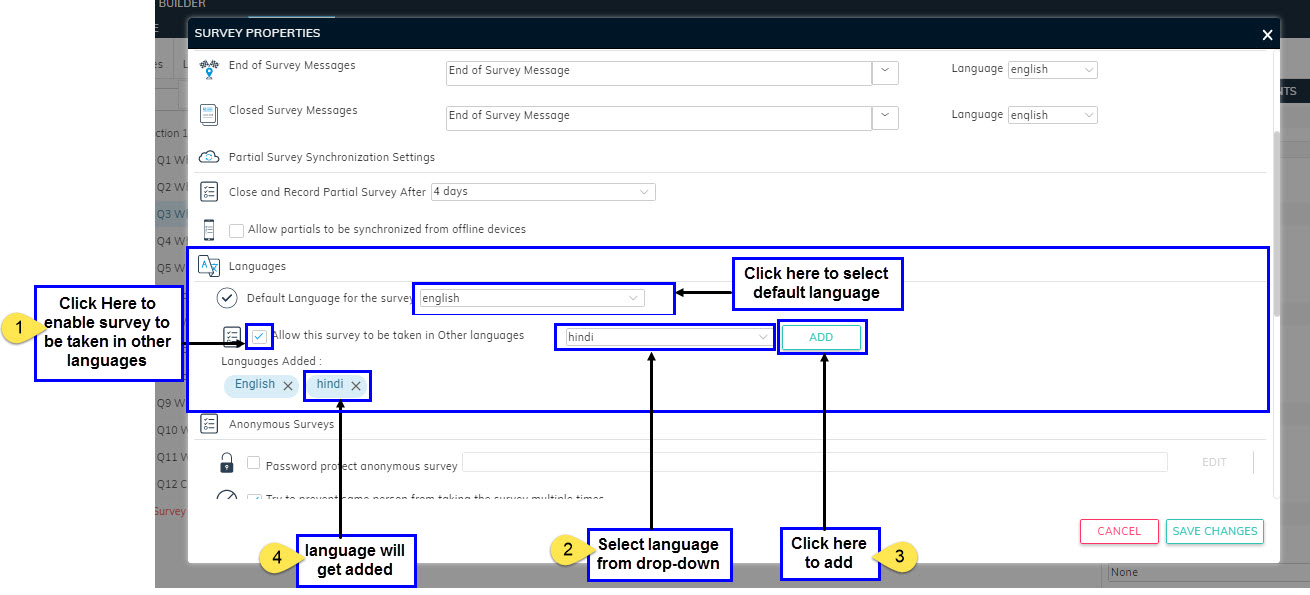
Languages
Users can create their surveys in different languages depending upon the requirement.
If the users selects the check box for "Allow survey to be taken in other languages" they can Add languages in which the survey can be designed and launched by the respondents. (Refer Section Doing Multilingual Surveys)
Note: On survey launch users will not be able to Select language if the Select Language option is disabled in the Survey Settings.
If no languages are Added, the survey will be launched in the Default or fallback Language selected in "Default language for the survey field".
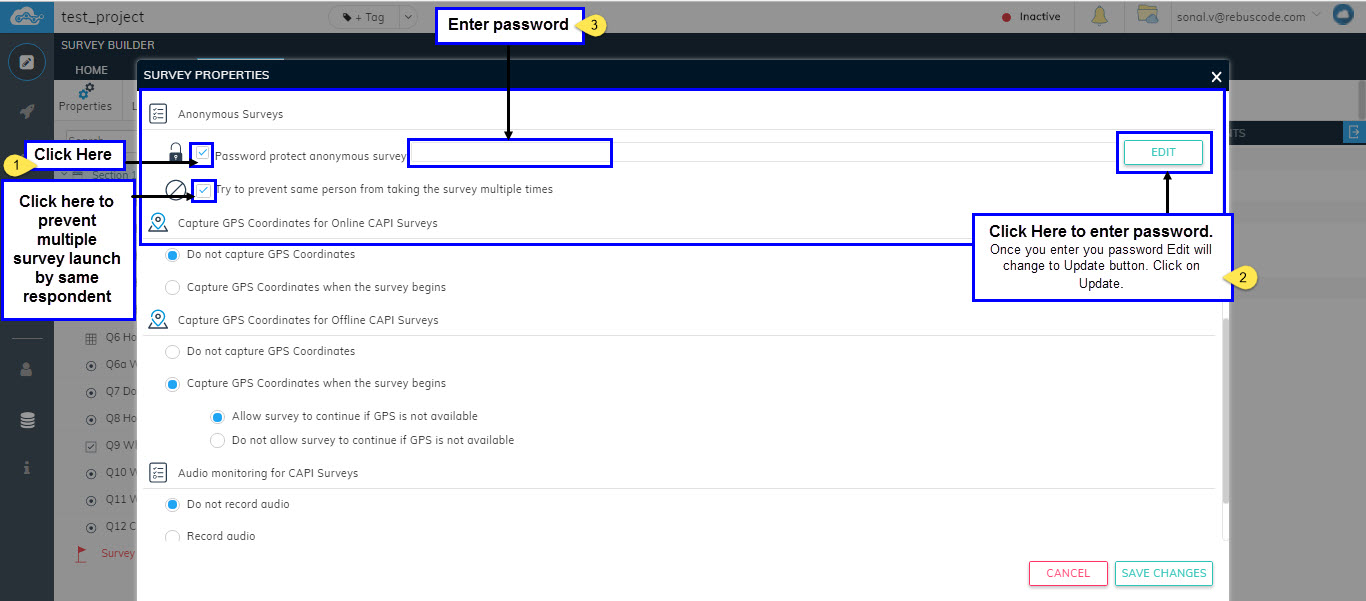
Anonymous Surveys
Users can apply anonymous setting to their survey. There are two settings available as below:-
- Password Protect anonymous survey : By selecting this property, users can make their survey password protected by setting up the password for their survey. By doing this, only the people with whom the password is shared will be able to unlock the survey.
- Try to prevent the same person from taking the survey multiple times : This property can be selected in case the user does not want the respondents to take the same survey multiple times. Once this property is applied, the user can only take the survey once by clicking on the respective survey link. If the user clicks on the link for the second time, the survey will not be launched and will show Completed status.
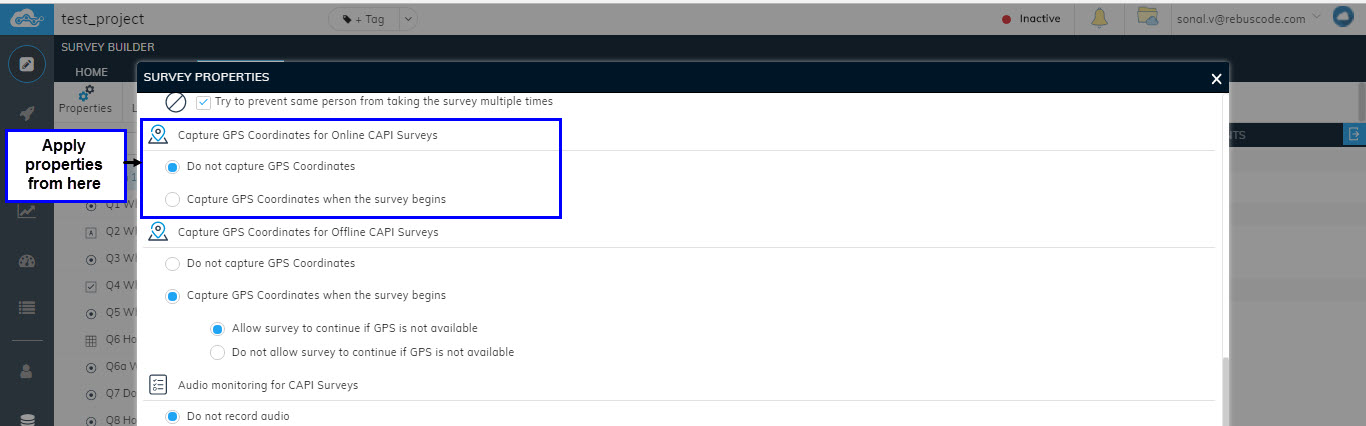
Capture GPS Coordinates for Online CAPI Surveys
CAPI surveys are basically Tablet based surveys. Users can either choose to Capture the GPS coordinates by selecting "Capture GPS coordinates when the survey begins" property in case the want to capture the location where the survey is happening.
OR
Users can Select "Do not capture GPS coordinates" property. if the information of the location is not required.
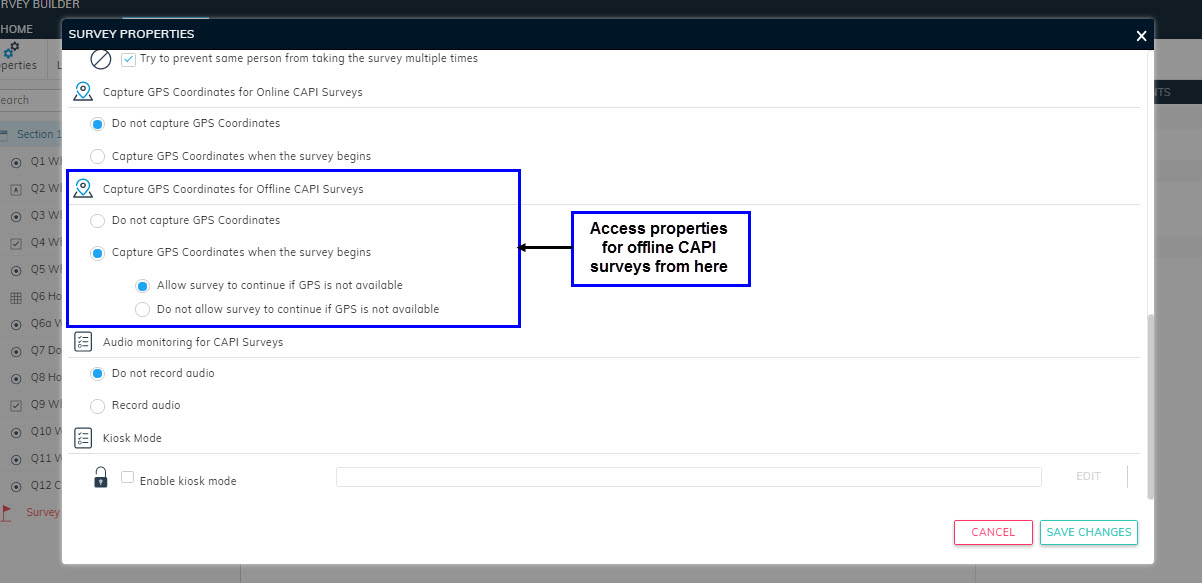
Capture GPS Coordinates for offline CAPI surveys
RebusCloud also allows the surveys to be taken in offline mode which are stored in the device and are synced to the server once the device gets into internet network connectivity.
Users can Select "Do not capture GPS coordinates" property. if the information of the location is not required.
OR
Users can either choose to Capture the GPS coordinates by selecting "Capture GPS coordinates when the survey begins" property in case the want to capture the location where the survey is happening.
They can further choose between two options in case GPS coordinates are being recorded. These options are-
- Allow survey to continue if GPS is not available : Selecting this will enable the user to take survey even of the GPS information is not available.
- Do not allow survey to continue if GPS is not available: If this property is selected, users will not be able to launch the survey until the GPS is available.
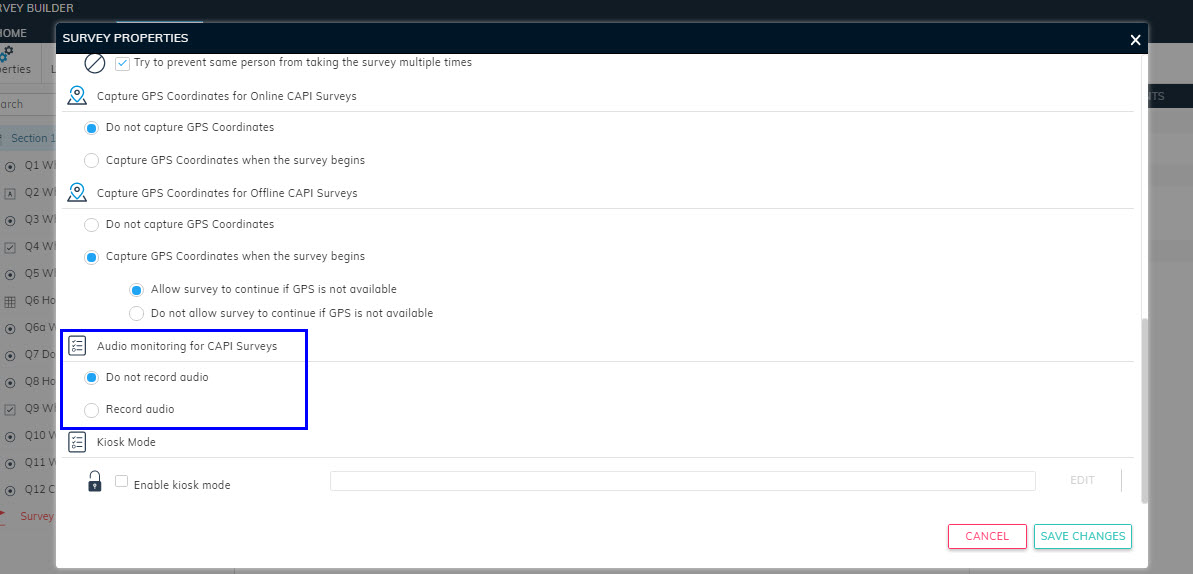
Audio monitoring for CAPI Surveys
For Tablet based CAPI surveys, users can choose to Record Audio by selecting "Record Audio" property. Select "Do not Record Audio property" if audio recording is not required.
Kiosk Mode
Related Articles
Creating a Survey from scratch
Creating a survey from scratch is as simple as clicking a few buttons. Once you have successfully logged in to the Consort suite, you will arrive at the Create new surveys page. To create a survey from scratch, click on the Create a new survey ...Chart Properties
chart Warning : Indicates a warning that might need attention.Question Properties
Question properties are originated in the Designer section after adding a question. They are essentially the advanced settings for a particular question type which helps the user to change or update many features available such as Changing layouts, ...Testing a Survey Link
The Distribute module has two types of links: Live Anonymous link and Test Anonymous link. Once the Survey is activated, users can test their survey via Test Survey Link. This will allow users to preview the survey and collect test data to check if ...Manage Survey Assets
adsad